Most drivers ignore this simple car part until the rain starts — here is what you should know

This simple five-minute fix is a skill that every vehicle owner can master without ever needing a professional mechanic.
Wiper blades are easy to forget about until the rain starts pouring, and suddenly those overlooked parts of your car become your best friend. Most drivers do not give them a second thought until streaks and smudges make it hard to see the road. The good news is that with just a little effort, you can swap out the rubber blades yourself in almost no time. It is a simple, quick task that saves you from paying extra at a garage.

Why wiper blades matter
Wiper blades might seem like a small detail, but they are among the most important features for safe driving. Clear visibility in any weather is essential, especially on high-speed roads or in heavy traffic. The first wiper blade was invented in the early 1900s by Mary Anderson, who noticed how difficult it was for trolley drivers to see through rain-covered glass. Her simple but brilliant idea changed driving forever. Today, wiper blades continue to play a vital role in keeping your windshield clean during rain, snow, or road spray, ensuring you can react quickly to hazards.
The different blade styles
Before you replace your wipers, it is helpful to understand the three main types of blades available.
Conventional frame-style blades are the most common on older vehicles, using a metal or plastic frame with several pressure points. While affordable, they can freeze in winter conditions.
Beam blades, or flat blades, feature a sleek, one-piece frameless design that provides even pressure across the entire windshield. These are excellent for all-weather performance and tend to last longer.
Hybrid blades combine the best of both worlds, offering an aerodynamic casing with the sturdy pressure of a frame, balancing performance and price.

The different connection types
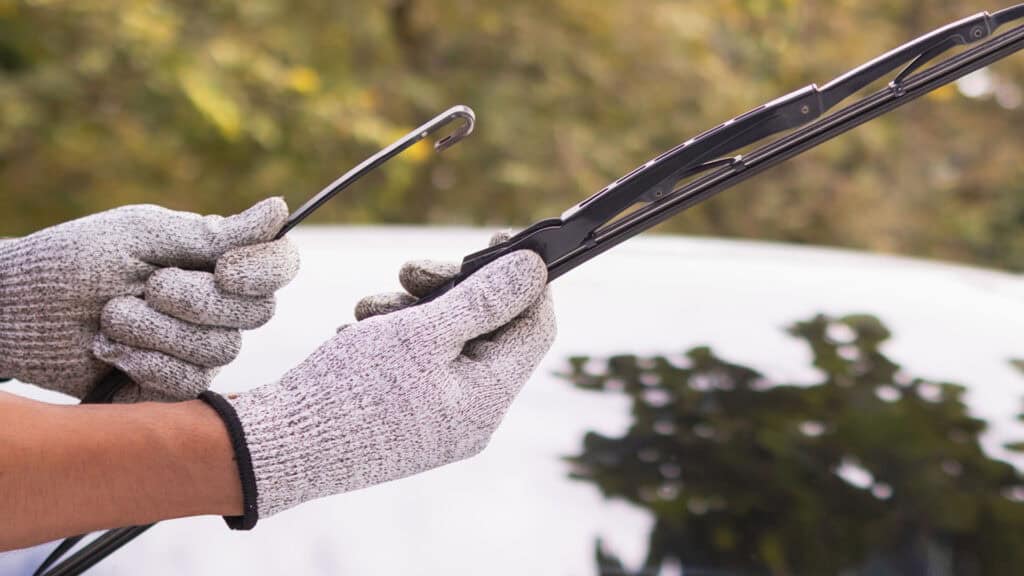
One of the most important steps in this process is identifying how the blade attaches to the metal arm. In the United States and Canada, four connection types dominate the market. The J-Hook is the most recognizable, easily identified by the distinct “U” or “J” shaped curve at the end of the metal arm.
This style is the gold standard for reliability and is typically found on the Toyota Camry, Honda Civic, and older Ford F-150 models. To replace a J-hook, you press a small plastic tab on the underside and slide the blade down toward the base of the arm. To install a new one, you simply slide the adapter into the curve and pull upward until you hear a firm click.
The Push Button or Top Lock connector is a modern design characterized by a flat, straight arm with a square button sitting on the top surface. This style is the standard for many newer vehicles, including the Volkswagen Golf, Audi A4, and recent Chevrolet Silverado models. Removing these is straightforward: you depress the button with your thumb and slide the blade away from the arm. For installation, you align the new blade with the tracks on the arm and slide it in until the button pops through the hole in the connector with a clear snap.
The Side Pin connection is unique because the attachment point is on the arm’s side rather than its end. You can identify it by a small metal cylinder or pin sticking out perpendicularly from the arm near the tip. This style is frequently found on the BMW 5 Series, Mercedes-Benz C-Class, and some GMC Sierra trucks. To remove these, you usually rotate the blade 90 degrees away from the arm to clear the locking tab, then slide it off the pin to the side. To install a new one, hold the blade perpendicular to the arm, slide it onto the pin, and rotate it back until it is parallel and locked.
The Pinch Tab connector is named for the two small plastic fins located on the sides of the attachment housing. This design is popular for its low profile and ease of use, and it commonly appears on the Nissan Altima, Mazda 3, and various Audi A6 models. To remove these blades, use your thumb and forefinger to pinch the two side tabs together to release the internal lock, then pull the blade straight out of the arm. When installing the replacement, you simply squeeze the tabs, slide the connector into the arm’s slot, and release them once the unit is fully seated and the lock engages.
How to choose the right size
Choosing the right blades involves getting the correct length for your specific vehicle. The easiest way is to check your owner’s manual or use an online fit guide by entering your car’s make, model, and year. It is important to note that the driver’s side and the passenger’s side are usually different lengths, so you should never assume they are identical. Most manufacturers also list compatible vehicles on the back of the wiper blade packaging. Picking a trusted brand like Bosch, Rain-X, or Michelin will generally ensure a smoother, quieter, and longer-lasting performance.
How to know when to replace your wiper blades

Blades are exposed to the sun, rain, snow, and ice, so it’s no surprise they wear out faster than other car parts.
Several signs can indicate that your wiper blades are no longer doing their job correctly. The most common issues are noticeable streaks across the windshield, patches of water that never seem to clear, or an annoying squeaking sound every time you turn the car on; chances are, the rubber has started to break down. The blades may also skip or leave lines, which means they are no longer making even contact with the glass.
Weather plays a major role in wiper blade damage. For example, in freezing temperatures, blades can become stuck to the windshield. If they’re turned on before being thawed, the rubber can tear or split. In extremely hot weather, the rubber can dry out or even melt slightly, sticking to the glass and leaving behind residue or warping. Sand, dirt, and road debris can also erode the rubber edge over time, especially if you use the wipers on a dry or dusty windshield.
How to replace
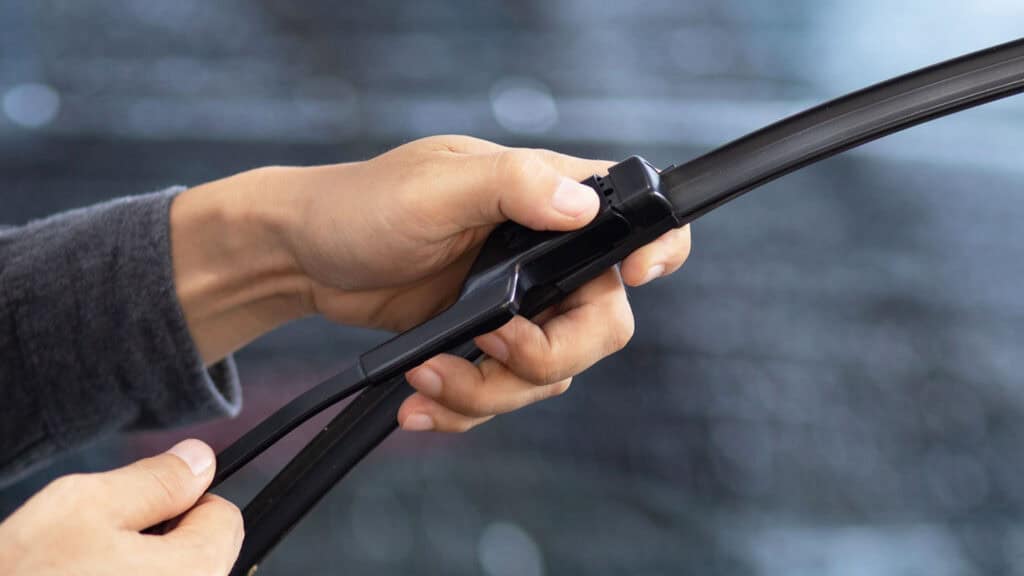
Once you have the correct blades, the installation process is a simple DIY task. Start by gently pulling the wiper arm away from the windshield until it stays in an upright, vertical position. You must be careful during this stage because the arms are spring-loaded; if they snap back without a blade attached, they can easily crack the glass. Once the arm is secure, locate the locking mechanism—whether a button, tab, or pin—and release the old blade according to its specific connection type.
After the old blade is removed, prepare the new blade. Many modern beam blades come with various adapters in the box to fit different arm types, so ensure you have the correct one clicked onto the blade before attempting to attach it to the car. Slide the new blade onto the arm until it locks firmly. You should always give the blade a light tug to confirm it is securely attached before lowering the arm. Finally, carefully place the arm back against the glass and test the wipers using your windshield washer fluid to ensure they move smoothly and clear the glass evenly.
Maintenance
To get the most out of your new wipers, a few simple maintenance habits can make a big difference. Regularly cleaning your windshield helps prevent dirt and debris from wearing down the rubber edge. You should also wipe the rubber blades themselves with a damp cloth every few weeks to remove accumulated grime. In winter, lifting your wiper arms during snowstorms prevents the rubber from freezing to the glass, helping it tear less when you start the car. By following these steps, you can maintain a clear view of the road and keep your vehicle safe in any weather.
Knowing how to replace wiper blades gives you one more bit of control over your car and your budget. So next time your wipers start skipping, smearing, or squeaking, don’t ignore them. Pick up a new set, snap them on, and enjoy a clear view without the repair shop bill.