
3 Easy home fixes that will make you feel like a pro, even if you’re not a DIY person
Simple repairs that keep homes running smoothly without the cost of calling in a professional.
Many household tasks do not require professional help, and several common issues can be resolved with basic tools and a bit of guidance. Handling simple fixes can reduce unnecessary expenses and help maintain a well-functioning home.
These everyday skills are straightforward, practical, and cost-effective. With minimal effort, homeowners can manage essential tasks and keep their living spaces operating smoothly.
Unclogging a drain

A clogged drain can often be resolved without professional assistance by using basic household tools and straightforward steps. The first measure is prevention, as blockages commonly form from accumulated hair, food residues, soap buildup, and grease. When water begins draining slowly, the drain opening should be inspected, and any visible material, such as hair or debris, should be removed by hand or with a simple drain hook.
If the obstruction is located deeper in the pipe, several at-home methods can help. Pouring a kettle of hot water down the drain can loosen and dissolve soap residue or fats lining the pipe. When the drain remains slow but not fully blocked, a mixture of baking soda and vinegar can be used. Pour about half a cup of baking soda down the drain, then add a cup of vinegar. The reaction helps break down minor clogs and interior buildup. After allowing the mixture to sit for at least 15 minutes, the drain should be flushed again with hot water. These methods are generally effective for minor blockages and avoid the potential damage to pipes associated with harsh chemical cleaners.

If the clog remains, physical tools are often effective. A plunger can create enough pressure to dislodge many blockages. The rim should form a tight seal around the drain opening, and repeated downward and upward motions will generate the necessary suction. For double sinks, the second drain should be plugged to maintain pressure, and the overflow opening should be covered to increase the plunger’s effectiveness.
When a plunger does not resolve the issue, a drain snake, or plumber’s auger, is a practical next step. The flexible metal coil is inserted into the drain and fed through the pipe by slowly rotating the handle. Resistance usually indicates contact with the blockage, which can then be broken apart or hooked and pulled out.
If a drain snake is unavailable or ineffective, the drainpipes beneath the sink can be opened. Most modern P-traps—the curved, U-shaped section—are plastic and can be loosened by hand. A bucket should be placed underneath to collect water before the connectors are unscrewed and the section removed. Clogs are often located in this part of the pipe. After clearing the debris and rinsing the components, the parts should be reassembled carefully, with rubber seals returned to their original positions to prevent leaks.
When these methods fail and the blockage is likely farther down the plumbing system, professional assistance is recommended. Stubborn or deep clogs may require specialized equipment and trained expertise.
Changing air filters in AC

Changing the air filter is one of those tasks that is easy to forget or ignore, but can lead to a costly repair. It takes just a few minutes, requires little to no tools, and can significantly improve HVAC system efficiency and reduce energy bills. A dirty filter restricts airflow, causing the system to work harder to push air through the dust. It also circulates dust, pollen, and other irritants through the home, which can lead to health issues. Professionals suggest replacing or cleaning the filters every 3 months.
Before any work begins, the system should be turned off to ensure safety. The air filter is typically located behind a return air grille on a wall or ceiling, or inside the HVAC unit near the blower compartment. Some panels require a screwdriver to open, while others can be lifted or slid off by hand. After the cover is removed, the old filter can be slid out and checked for its size, which is usually printed on the frame. If a part number or brand is listed, purchase an identical replacement. If not, the measurements and the HVAC unit’s model information can be used to select the proper filter. When installing the new filter, the arrows printed on the frame should point toward the blower motor, in the direction of airflow.

If the system uses a reusable filter, it should be removed, rinsed thoroughly with clean water, and allowed to dry entirely before reinsertion. While the filter is out, inspect the surrounding area for visible dust buildup, particularly on the intake grille or inside the compartment. A vacuum cleaner can be used to clean these surfaces. In smaller systems, such as window units or ductless air conditioners, the fins and vents can also be wiped with a soft cloth or brush to support proper airflow.
After the filter and components are clean and dry, reinstall the filter, secure the panel, and turn the system back on. If airflow remains weak or the air appears dusty, it may be necessary to confirm that the filter is correctly aligned and that no gaps allow unfiltered air to bypass it. Regular filter checks are essential in homes with pets or in dusty environments. Clean filters support better indoor air quality, help the HVAC system operate efficiently, and can extend the equipment’s service life.
Sealing with silicone or glue

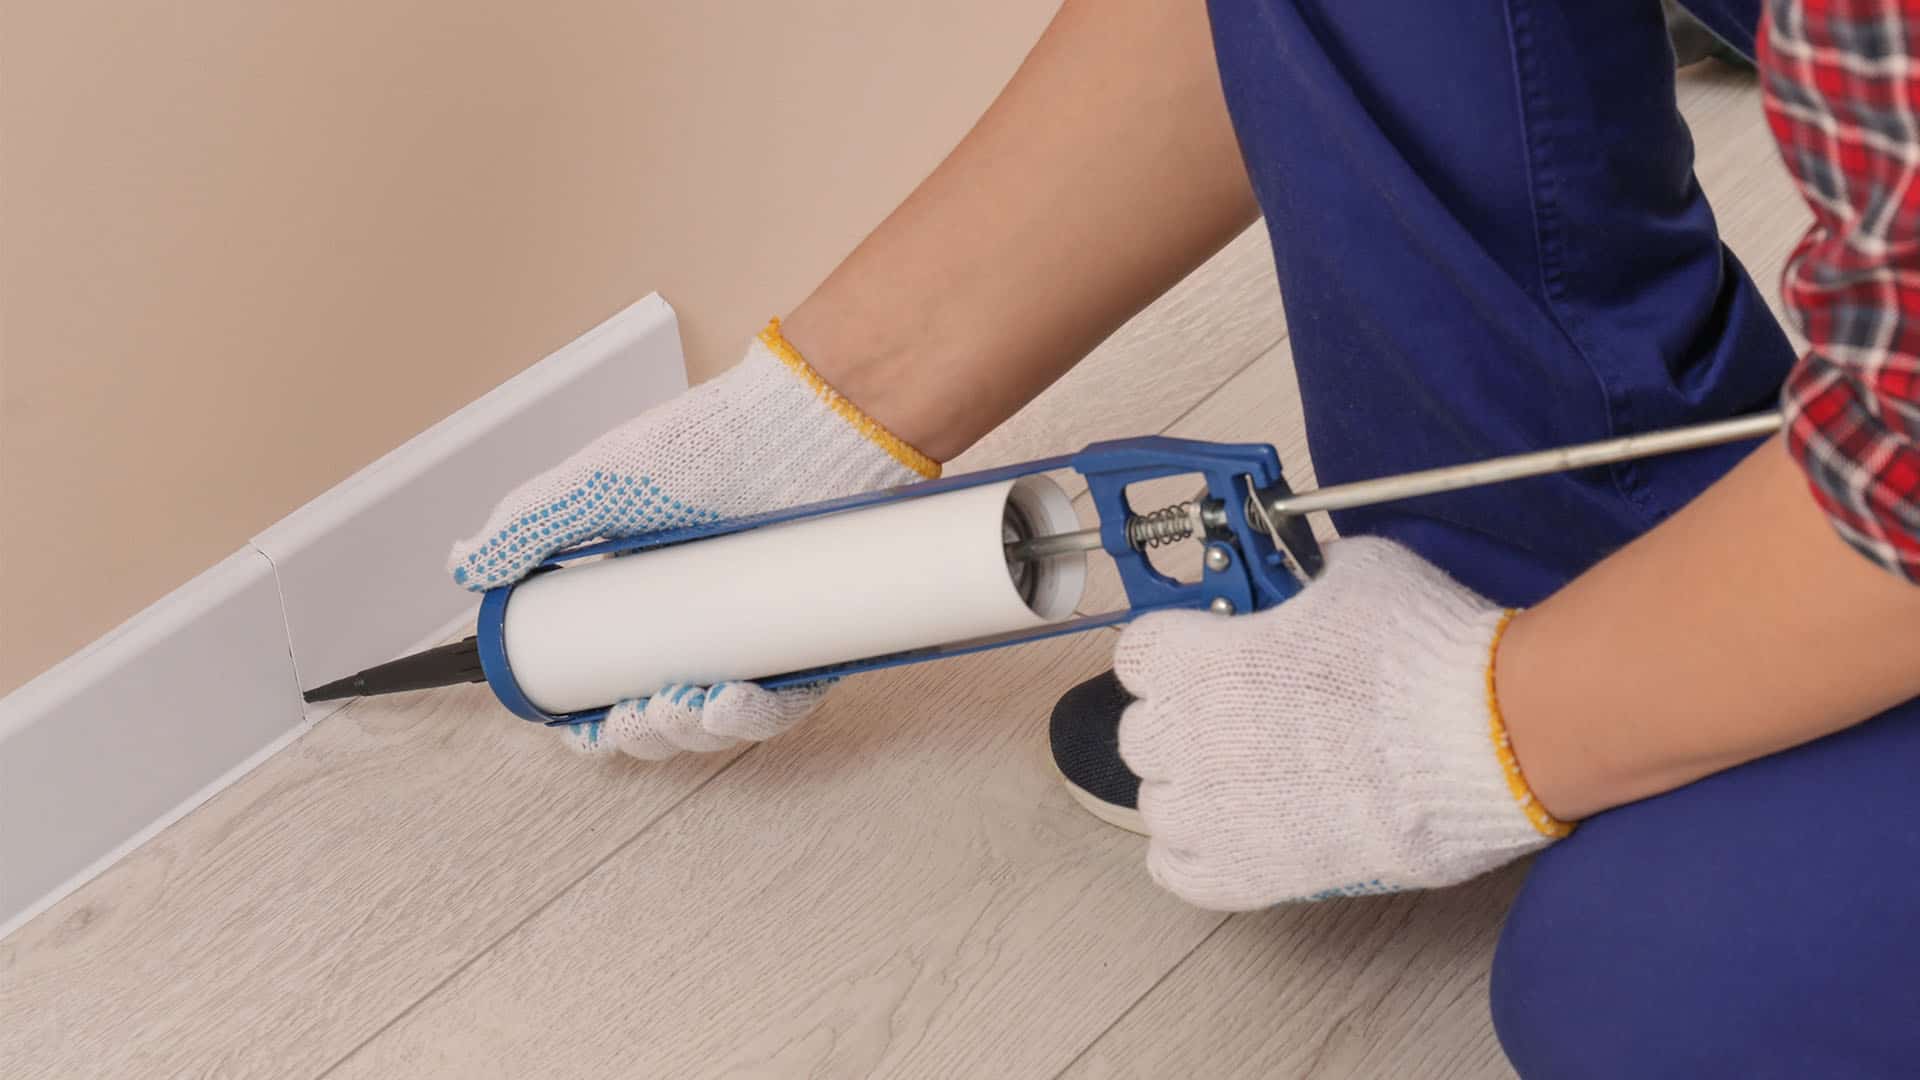
Sealing gaps around tiles, sinks, windows, or door frames is a routine maintenance task and can be completed without professional assistance. It is inexpensive, requires minimal equipment, and becomes easier with practice.
Selecting the appropriate product is essential. Wet areas such as bathrooms and kitchens require a waterproof, mold-resistant silicone sealant. Dry areas or painted surfaces are better suited to paintable acrylic caulk or construction adhesive. Many sealants are made for specific materials, such as tile, wood, and exterior surfaces.
A cartridge of sealant and a caulking gun provide the best control. The nozzle should be cut at a 45-degree angle to match the width of the gap being sealed. After loading the cartridge, the gun is held at a steady angle while a smooth, continuous bead of sealant is applied along the joint. Slow, consistent pressure helps prevent gaps or excess material. The application can be paused and resumed as needed, as the sealant does not harden immediately.
If silicone sealant is being used, the surface can be smoothed with a finger or a finishing tool lightly dipped in soapy water. This helps create an even finish and prevents the material from sticking. The soapy water should only be applied during smoothing and never before the sealant is placed. Using it beforehand can interfere with the silicone’s ability to bond, resulting in weak adhesion. Excess water should also be avoided, as too much moisture can affect the surface and slow the curing process.
Any stray sealant should be wiped away immediately with a damp cloth before it begins to dry. The sealant must then be allowed to cure for the time recommended on the product label, which can vary from several hours to a full day. When applied correctly, sealing is a quick and inexpensive way to improve a home’s appearance and durability. Proper technique and the correct materials can produce results comparable to professional work.